Set Up Your Products in Printed Mint
Before syncing with your products, the first step is to create your Printed Mint products/designs. This makes it easy to connect your store listings for fast, accurate fulfillment.
This step is especially helpful for products with variants—like t-shirts, aprons, cosmetic bags, or any items with multiple sizes or colors.
To get started, head to the Product Catalog in your Printed Mint dashboard and begin adding your designs to the products you want to offer.
💡 Once your designs are added, you’ll be able to connect them to your store products with just a few clicks.
Designing Your Products
During the design process, you have two options:
-
Save and Exit:
Save your product design and return to the Product Catalog to continue building your collection.
This is a great choice for retailers who already have mockups and listings set up in their store. -
Send to Shop:
Push your newly designed product—including mockup, title, and pricing—directly to your store as a brand-new listing.
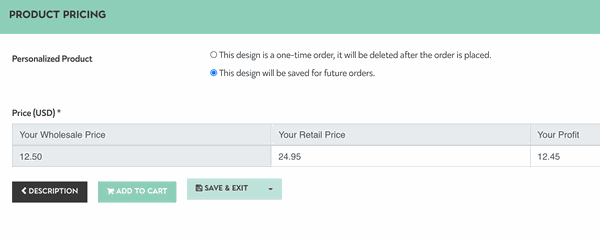
While setting up your product designs, you can:
-
Add a custom product title
-
Set your retail price and profit margin
-
Select product variants (like size and color, if applicable)
💡 This gives you full control over how your product appears in your store—before it even goes live.
Managing Your Designed Products
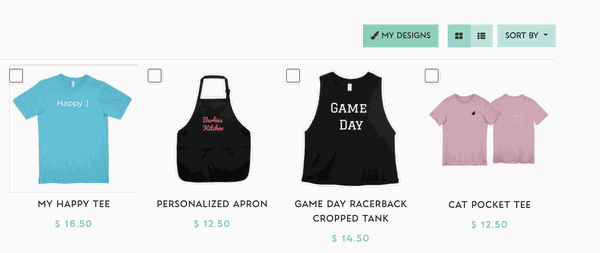
Once you’ve added designs to your products, you’ll notice a new tab in the Product Catalog called “My Products.”
Click the “My Products” button anytime to:
-
View all the products you’ve designed and saved
-
Edit your designs if you need to make changes
-
Download mockups for your listings or marketing
-
Send to Shops to push the product directly to your store
-
Archive any designs you no longer wish to use
🗂️ Whether you're polishing a product or retiring a listing, everything you need is right there in your dashboard.
Send Your Designed Products to Your Store
Once you've added your product designs to your Printed Mint products, you can publish them to your store with just one click.
Simply click the “Send to Shops” button located within each Printed Mint product you’ve designed.
Your product will instantly be pushed to your connected store and ready to sell!
Sync Your Existing Store Products to Printed Mint
You can easily sync your existing store’s products with Printed Mint at any time:
-
Go to the “Connected Shops” tab in your Printed Mint dashboard.
-
Click on the “Products” button next to your integrated store.
-
Under the “Not Synced” tab, click “Fetch New Products” to pull in your store’s current listings.
-
Find the product you’d like to connect and click “Mapping.”
-
Next, click “Manage Associated Designs” and choose your Printed Mint product.
-
Finish by clicking “Connect.”
That’s it! Your store product is now linked to a Printed Mint product and ready for fulfillment.
Syncing a Printed Mint product with your store is a straightforward process. Easy as 1, 2, 3! Follow these steps to ensure a seamless connection:
- Access Your Integration HERE:
- Go to the `Not Synced` tab. This section lists products that are not currently connected to a Printed Mint product.
- Find and the Product You'd Like to Connect:
- Click on the `Mapping` button next to the product you want to sync.
- Click Manage Associated Designs:
- Click the Manage Associated Designs - Locate your Printed Mint Designed Product.
- Next Click "Connect Design"
- You will now see your stores product connected to your Printed Mint product in your Printed Mint/Connected Shops/Products/Connected Tab. Success!
If you need any assistance, feel free to reach out to us at support@printedmint.com.
Automatic Billing and Approval:
If your integration settings are set to automatic billing and approval, orders with synced products will move straight into production.
Manual Approval:
If your settings require manual approval, your orders will first appear in the "Draft" tab. During this time, you have the flexibility to:
Edit order items, Revise designs, Add gift messages, Update shipping information and Choose packaging options.
🔔 Important Reminder
If you're using multiple Print-on-Demand providers, make sure to enable SKU Filtering in your Connected Shops settings.
This helpful feature ensures that only the orders you want Printed Mint to fulfill are synced to us—keeping everything organized and running smoothly. Only products synced from Printed Mint to your store -OR- products with a SKU prefix with PM will sync to Printed Mint when this feature is turned ON.
💡 Pro Tip: Turn on SKU Filtering before syncing products to avoid fulfillment mix-ups.
Comments
0 comments
Article is closed for comments.